How to Master Circuit Board Assembly for Beginners?
Circuit board assembly can seem daunting for beginners. This critical process connects various electronic components. Mastering circuit board assembly requires patience and practice.
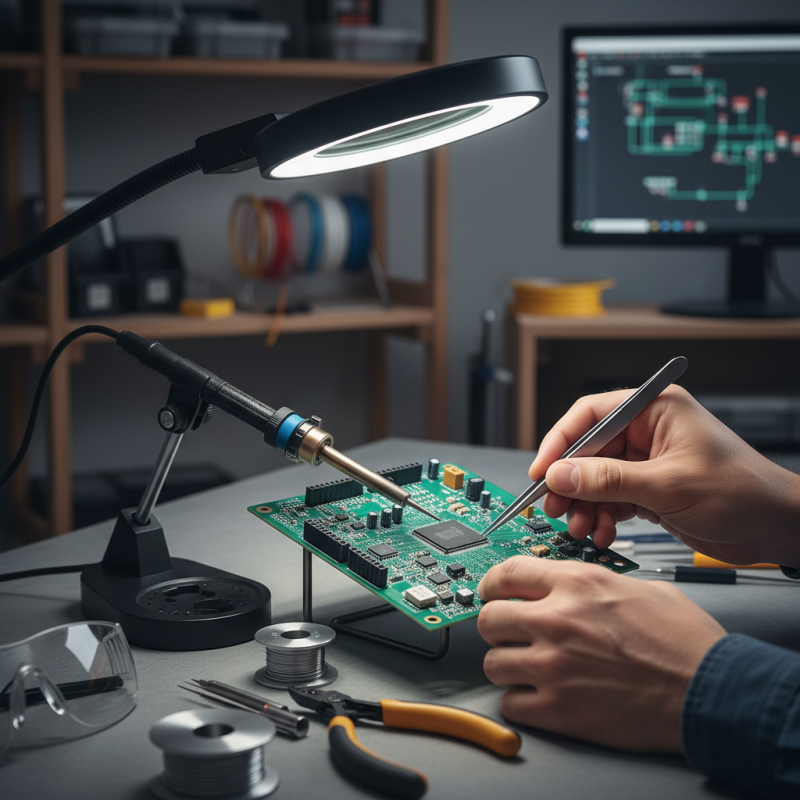
Start by familiarizing yourself with essential tools. Soldering irons, tweezers, and magnifiers are vital. Each has unique functions, and learning how to use them properly is crucial. Don’t rush the learning process. Mistakes will happen, like soldering components incorrectly. Reflecting on these errors helps improve your skills.
Consider following detailed guides or watching tutorial videos. These resources can illustrate techniques in action. Building simple projects can reinforce your learning. As you progress, tackle more complex assemblies. Embrace the challenges, as each one provides valuable experience. Ultimately, mastering circuit board assembly opens the door to endless opportunities in electronics.
Understanding the Basics of Circuit Board Assembly for Beginners
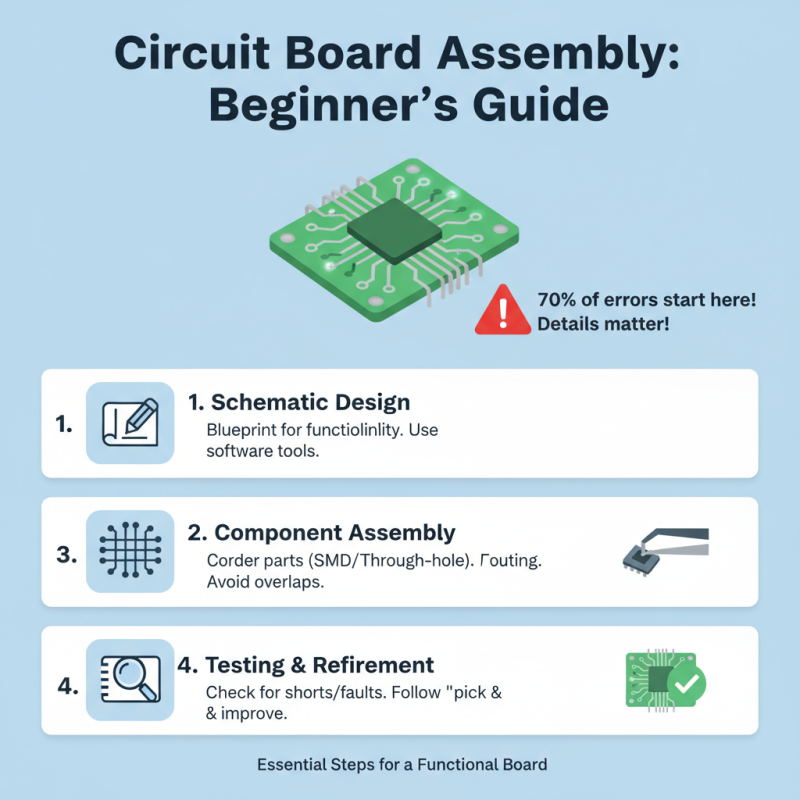
Understanding circuit board assembly is essential for beginners. This process involves multiple steps, each critical to creating a functional board. A key aspect is designing the schematic. Professionals often use software tools for this task. Data shows that nearly 70% of design errors arise at this stage. Beginners can overlook small details, leading to future problems.
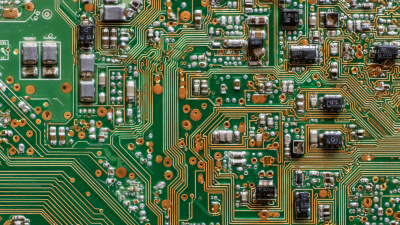
Next is the printed circuit board (PCB) fabrication. This can be daunting for newcomers. Industrial reports highlight that about 40% of assembled boards have issues related to improper soldering. Beginners sometimes rush through this phase. Inadequate soldering can cause failed connections. Taking time to learn proper techniques is vital.
Lastly, assembling components requires patience. If components are incorrectly placed, the entire board may fail to function. Many new assemblers underestimate the importance of this step. It's common to make mistakes, but reflecting on them helps improve skills. Documenting errors can support growth over time. Continuous practice and review build a solid foundation in circuit board assembly.
Essential Tools and Materials for Circuit Board Assembly
When starting with circuit board assembly, having the right tools and materials is crucial. Some essential tools include soldering irons, wire strippers, and multimeters. A good soldering iron heats up quickly and allows for precise control. Multimeters are invaluable for checking continuity and voltage levels during assembly.
Additionally, basic materials like solder, PCB boards, and components such as resistors and capacitors are essential. According to a recent industry report, over 70% of beginners faced challenges due to inadequate materials or faulty tools. Components should be of good quality to ensure a dependable circuit.
While it's easy to overlook, a clean workspace is vital. Clutter affects focus. Poor organization can lead to errors. Beginners often underestimate this, leading to frustrating mistakes. Proper planning and tool selection improve overall efficiency in assembly. Recognizing these aspects is key to mastering circuit board assembly for beginners.
How to Master Circuit Board Assembly for Beginners? - Essential Tools and Materials for Circuit Board Assembly
| Tool/Material |
Description |
Purpose |
Notes |
| Soldering Iron |
A hand tool used to join two or more electronic parts together. |
Essential for soldering components onto PCB. |
Choose a temperature-controlled soldering iron for better precision. |
| Solder |
A fusible metal alloy used to create a permanent bond between metal workpieces. |
To connect electronic components to the circuit board. |
Lead-free solder is recommended for environmental safety. |
| Wire Cutters |
A tool used for cutting wire. |
To trim excess leads from components after soldering. |
Flush cutters provide a clean cut for better appearance. |
| Multimeter |
An instrument for measuring electrical properties like voltage, current, and resistance. |
To test and troubleshoot circuits. |
Digital multimeters are more user-friendly than analog ones. |
| Tweezers |
Small tools used for gripping small objects. |
To hold and manipulate small components during assembly. |
Anti-static tweezers help prevent damage to sensitive components. |
Step-by-Step Guide to Schematic Design and Layout
Creating a schematic design is a critical step in circuit board assembly. It requires precision and attention to detail. The basic elements include resistors, capacitors, and integrated circuits. Ensure correct placement to avoid short circuits. According to industry reports, a staggering 80% of PCB errors stem from design flaws. Therefore, testing designs in simulation software is essential.
Layout design follows schematic creation. This is where the real challenge often appears. Starting with an optimal routing means minimizing interference. Keeping trace lengths short can reduce signal delay. In fact, studies show that reducing trace length by just 10% can improve efficiency by 15%. Use vias wisely to manage the flow of signals. Ensure proper grounding; neglecting this can lead to noise issues.
Mistakes will happen. Common issues include overcrowded designs leading to manufacturing errors. It's crucial to iterate on designs and solicit feedback. Viewing layouts from different angles can reveal hidden flaws. Design reviews are beneficial but often overlooked. Embracing a mindset of continuous improvement can enhance skills over time.
Techniques for Soldering and Component Placement
Soldering and component placement are vital skills in circuit board assembly. Understanding these techniques can significantly enhance the quality of your work. According to the IPC-J-STD-001 standard, proper soldering practices are crucial. A well-soldered joint has a smooth and shiny appearance, but achieving this can be tricky for beginners. The ideal temperature for soldering is around 350°C. It prevents damage to sensitive components. Experience teaches that too much heat can lead to burnt circuits.
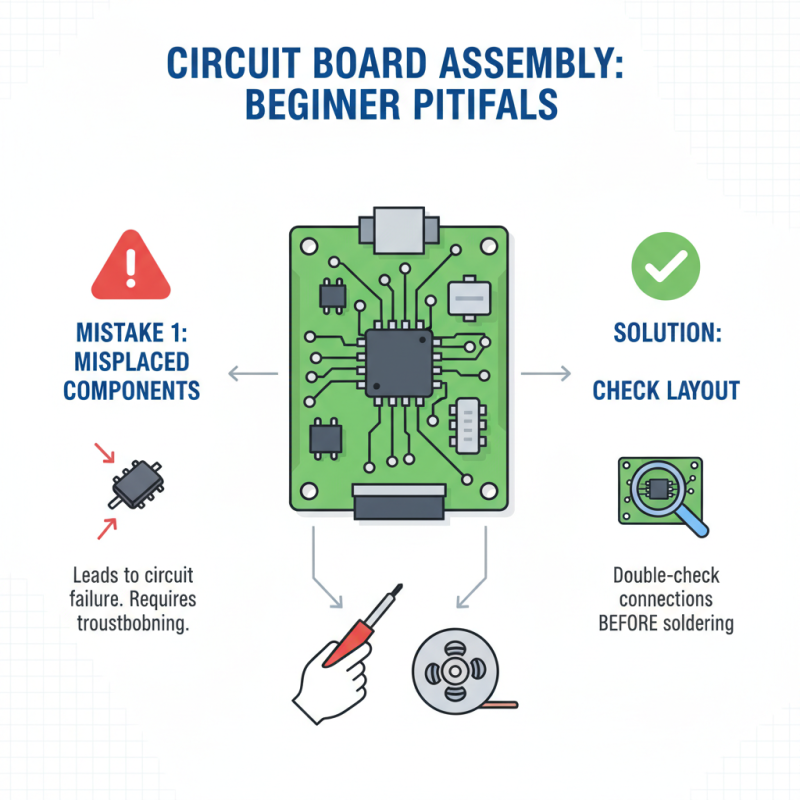
When placing components, accuracy is key. Misaligned components can cause malfunctions. Studies show that nearly 20% of assembly issues stem from improper placement. A magnifying glass can help spot misalignments before soldering. Using tweezers to handle small components improves precision. However, even the most skilled assemblers occasionally misplace components, making double-checking vital.
Practicing soldering and component placement regularly helps develop muscle memory. Beginners often struggle with the right amount of solder. Too little may create weak connections, while too much can bridge connections unintentionally. Training with practice kits allows for error correction. Accepting mistakes is part of the learning process. Embrace imperfections; they provide valuable lessons for future projects.
Mastering Circuit Board Assembly: Soldering Techniques and Component Placement