How to Design an Electronic Circuit Board for Beginners?
Designing an electronic circuit board can seem daunting for beginners. However, with the right guidance, it becomes an enjoyable challenge. Understanding the basics is crucial. You need a clear idea of what components you will use. Each component plays a role in the functionality of your project.
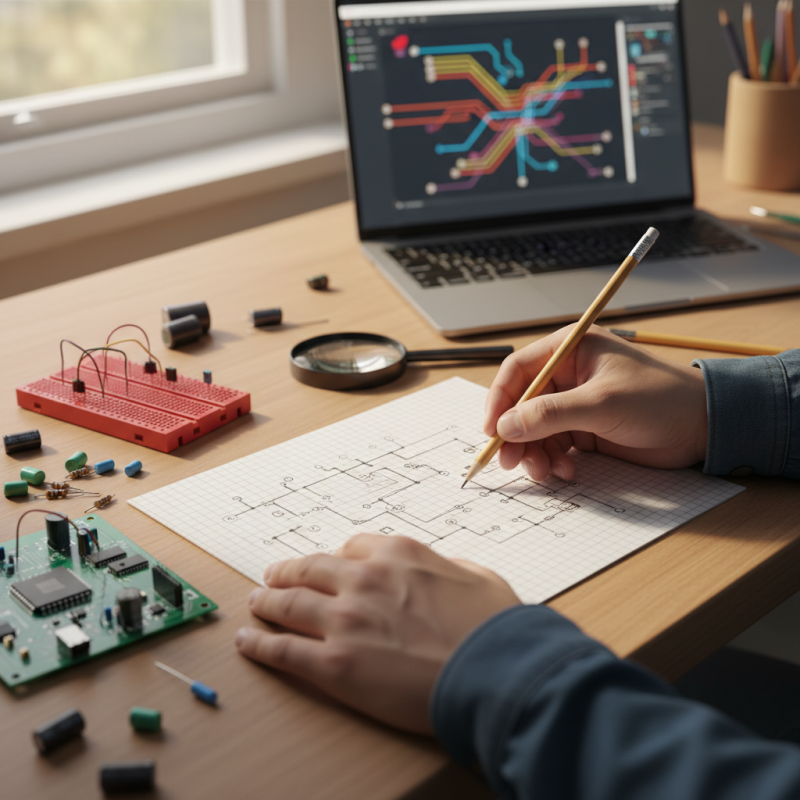
When starting, consider the layout. A well-organized design will help prevent errors. Sketching your circuit on paper first is a good practice. This step may seem simple, but it can save you from significant issues later on. Mistakes in circuit design can lead to malfunctioning devices.
Finally, remember that creating an electronic circuit board is a learning process. Don’t fear errors; they can lead to valuable insights. Each prototype teaches you something new. Embrace the imperfections and reflect on what works and what doesn’t. This journey will lead to improved skills and creativity in your electronic projects.
Understanding the Basics of Electronic Circuit Boards
Designing an electronic circuit board (PCB) can seem daunting at first. Understanding the basics can make this task easier. A PCB is a board that connects various electronic components. These components are soldered onto it to create functional devices. The design process starts with creating a schematic diagram. This diagram shows how the components connect. It is a critical step that cannot be rushed. Mistakes at this stage can lead to frustrating results later on.
After the schematic is complete, the layout follows. This involves deciding where to place each component on the board. Keep in mind the size and shape of the PCB. The placement affects performance. For instance, components that require less space can be placed closer together. However, be cautious; overcrowding can create issues like overheating. Some beginners overlook this aspect, leading to regrets once the board is fabricated.
The next step involves routing the connections. This stage requires attention to detail. Each trace must be carefully designed to avoid interference. Beginners often find this challenging. A common mistake is creating traces that are too thin or too close. This can result in short circuits or signal loss. It’s vital to take the time to understand these concepts, as they can significantly influence the PCB's functionality. Learning from early mistakes is part of the journey.
Electronic Circuit Board Design Progress
The chart illustrates the estimated time spent at each stage of the electronic circuit board design process. The stages include Research, Schematic Design, Layout Design, Prototype Testing, and Final Adjustments, highlighting the progression through the complexity of circuit design.
Key Tools and Software for Designing Circuit Boards
When starting to design an electronic circuit board, the right tools can make a significant difference. Software applications are essential for sketching and creating layouts.
Many of them include features to help beginners grasp circuit design concepts. Look for tools that offer simulation features. These can help visualize how your circuit will function before building it.
Learning to use these tools might take time, but it's a valuable investment.
Another important aspect is the design software's user interface. Some are user-friendly, while others may feel overwhelming. Spend time exploring tutorials and community forums. They can provide insight into common challenges and solutions.
Experiment with layering techniques. Sometimes, beginners overlook this, leading to cluttered designs that are hard to troubleshoot.
Consider free resources to avoid financial strain during your learning process.
Don't forget about hardware tools. A good multimeter and soldering kit can help you test and build your circuit boards effectively. Mistakes will occur, and that’s perfectly okay.
Each error is a learning opportunity. Embrace them and reflect on what went wrong. With patience and practice, your skills will improve, paving the way for future projects.
Step-by-Step Process for Creating a Simple Circuit Layout
Designing an electronic circuit board can seem daunting for beginners. However, breaking it down into clear steps simplifies the task. Start by sketching your circuit layout on paper. Use symbols for components like resistors and capacitors. This initial plan helps visualize the flow. According to industry reports, 75% of circuit design problems stem from poor planning at this stage.
Next, move to software tools. Many free options are available, like KiCad and EasyEDA. These tools allow you to create precise layouts digitally. Ensure that your components are placed logically. Keep connections short to minimize interference. Remember, even small errors in placement can lead to major issues. Research shows that 30% of prototypes fail due to design flaws.
Routing the connections requires careful attention. Use different layers for power and signal paths to avoid noise. Test your design using simulation features in the software. Often, first-time designs have overlooked paths. It's common to miss these details. Engage with online forums for feedback. They provide insights that can improve your design significantly.
Common Errors to Avoid When Designing Circuit Boards
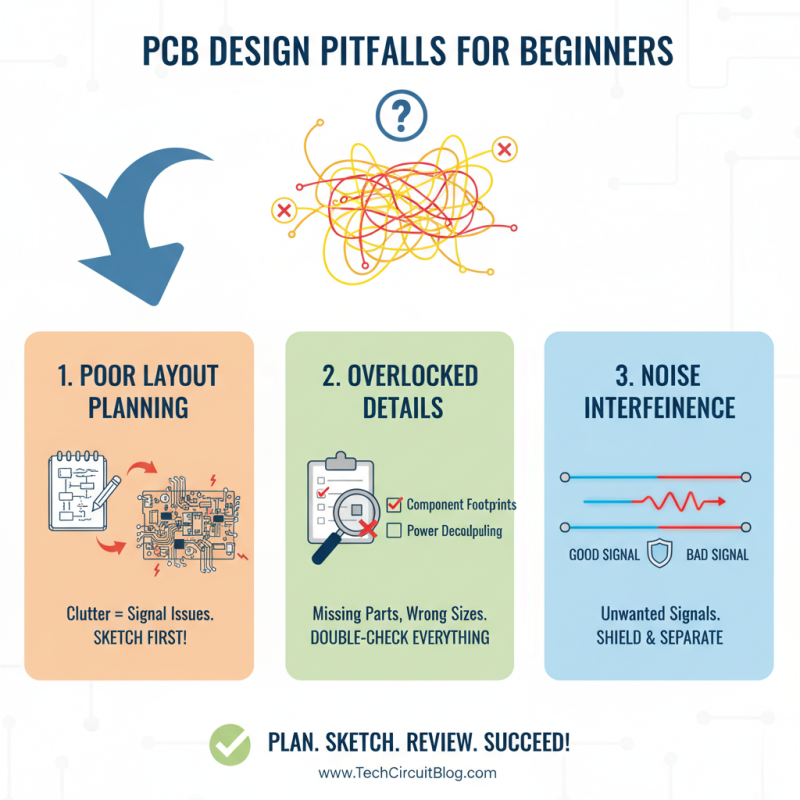
Designing an electronic circuit board can be tricky, especially for beginners. Many new designers overlook essential details, leading to common errors. One major mistake is not planning the layout properly. A cluttered design can cause signal interference, which affects the circuit's performance. Make sure to sketch your ideas before diving into software.
Another frequent error is inappropriate trace width. If traces are too narrow, they can overheat or fail under load. It's crucial to calculate the right trace width based on the expected current. Additionally, using vias carelessly can create unwanted bottlenecks. Think about how many layers you need; sometimes, simplicity is key.
Don't forget about component placement. Placing components too close can lead to heating issues. Leaving enough space allows for better airflow and easier soldering. Beginners often rush through this step, but careful planning here pays off later. Always review your design. Mistakes should be a learning experience. Use simulation tools to catch errors before production.
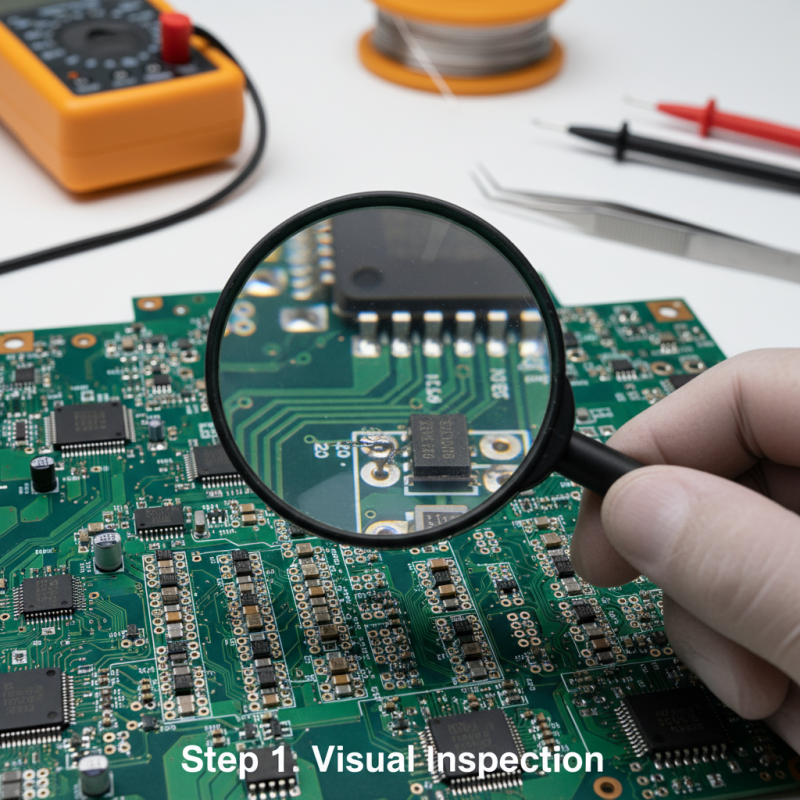
Testing and Troubleshooting Your Finished Circuit Board
Testing and troubleshooting your finished circuit board is crucial for ensuring it functions as intended. First, it's important to check for visible defects. Look for any solder splashes or misaligned components. These are common errors that can affect performance. A magnifying glass can be very helpful for this.
Next, use a multimeter to test for continuity. This step helps identify any broken connections. Ensure you set the multimeter correctly. Testing each trace can be time-consuming, but it’s essential. If a trace is broken, you can use a jumper wire to reconnect the circuit, although it may not look perfect.
Tips: Always keep a schematic nearby. This will help you trace problems quickly. If something seems off, double-check your power supply. Sometimes the issue isn't the board but the source of power. Remember, even experienced designers make mistakes. Reflecting on errors helps improve your skills. Don't hesitate to try again. Practice is key to mastering circuit design.